There are currently two scanners one is
Most likely in the basement lab connected to census the other is
probably in the library connected to logit. The scanner in the
basement is a ``document'' with a 20 page ``auto document
feeder''. The scanner in the attic is a ``flat bed'' scanner. The
forer is suitable for scanning one or two sided documents (probably
into .pdf format) that latter is useful for scanning images one at a time.
The Avision AV220 scanner in the basement lab is ideal for this task.
Assuming that your document is monochrome and contains writing on no
more than two sides of each page, then you can simply:
Before going down this road ask yourself it it is posible to either
convert a .pdf into what you want or to use .pdf instead. It's going
to be a lot simpler if you can. See Section 4 on
file format conversion for more information.
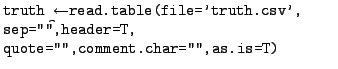
Well if you must scan into something other that .pdf, then you'll need
to use the scanadf command. The
scanadf command produces a file for each page in your stack
of documents. Those files will be in .pnm format, which though
seldom used, is easily converted into just about anything via a
pnmto-whatever command. See Section 4.3.1 for
information on the netpbm pakage, which allows you to convert .pnm
files to all sorts of other types.
@:

The result will be 13 files called 'page01.pnm - page13.pnm' in the
scannedpages directory.
Note that the ``-y 279'' refers to the length of the page(s) being
scanned. 297 conresponds to 11.5 inches. ``-mode 'Lineart''' is good
choice for black and white documents. There a lot of options that you
can experiment with, all of which are explained in the man page for
scanadf.
Once you have located the flatbed scanner (look in the attic) and
politely made sure that no one
else is using it, you can get started.
The scanner makes very little noise when not in use,
and has no on/off switch. If logit is on,
then the scanner is probably on as well - especially if it is plugged
in.
Get a terminal window on logit (either by logging in or
ssh'ing from another machine) and type
@: xsane
For tediously detailed instructions, see 5.3.1
Step by step instructions for using the scanner
- Get a terminal window on logit.
- Put a document on the scanner's glass window. (Lift up on front
of the document feeder). The document should be face down. It does
not matter where on the glass you put it. If you prefer to work with
right-side-up images, then make sure the top of the document is
closest to the wall.
- Launch the scanner interface program xsane by typing the command:
@: xsane
The result should be the main xsane dialog window and the preview
window shown in shown in figure 5.1
Figure 5.1:
xsane main dialog and preview windows
|
|
- Select the proper scan mode. The default is Lineart which is wrong for
most things. The scan resolution is set by the slider bar on the main
window just below the output filename. Resolution is given in dots per
inch (dpi). As you change the dpi setting, a box near the bottom of the window
displays the size of the resulting image file. For images that will be
used on computer screens, anything above 75 dpi is wasted space.
- click
 (on the Preview
Window) to see the image of
what's on the scanner. The clarity of the preview image
is not affected by the setting in the main window.
it is just there for cropping and fiddling.
(on the Preview
Window) to see the image of
what's on the scanner. The clarity of the preview image
is not affected by the setting in the main window.
it is just there for cropping and fiddling.
- To crop the image, click and drag the
 to create a dotted
line box around the part you want. The display in the main window
showing the size of the image in KB and in cm will change as you
adjust the size of the image to acquire.
to create a dotted
line box around the part you want. The display in the main window
showing the size of the image in KB and in cm will change as you
adjust the size of the image to acquire.
- If you are happy with what you have in the preview window. Then
on the main dialog box (not the preview window)
set the filename of the image file that you are about to create. The
default is out.pnm. Then push
 .
.
You can determine the format of the image file via the
 pull-down menu. The default type .pnm is easily converted
to other types - but if you know what you want, and it's in the
menu well...
pull-down menu. The default type .pnm is easily converted
to other types - but if you know what you want, and it's in the
menu well...
- When the image is scanned, and the out.pnm or whatever
you decided to call it is complete, you can use either xv or
(gimp) to convert (or edit) it to a more familiar or exotic format.
xv is easiest (by far)
to use, but it has no editing features. gimp is a much more
sophisticated image manipulation program which can edit, crop,
morph, and whatever the file. The commands for launching either are:
@: xv filename
@: gimp filename
If you are scanning a photograph and understand such things as
custom gamma tables and
color matrices you will want to explore options which
become available when you choose
color (as opposed to
Lineart or
Grayscale. Other knobs and dials are
available under the
[View] menu.
The process by which graphic images of written text are transformed
into editable text files is called ``optical character recognition''
or OCR. We do not have an OCR program running locally, but don't
despair. There is a site on the web that will do this for you and Gene
Hammel says it works pretty well.
Here is Gene's description:
Subject: Re: ocr
http://docmorph.nlm.nih.gov/docmorph/
Contains a good deal of information. Basically, a user must register and
have a password, then can log in and do all kinds of graphic and text file
conversions (except from pdf to anything else). You upload the file to be
transformed, you are informed when it is ready to download, and that's it.
It all takes place on the WEB page, in interaction with the file browsing
abilities of your own OS.
I had scanned 18pp of typed text at 600 dpi. These were *.pnm files. Each
was about 1 MB. I read the instructions on the docmorph page, then sent
and received each file separately.
First you click on a link to upload a file. You can type in the path or
browse for it, then click submit. After it uploads you get a message
saying to wait; it takes 12 seconds to process a page. Then a link appears
that allows you to download the file, which appears in your WEB browser. I
then saved this page as *.txt; the file naming is automatic. Then I clicked
the other link, to upload a new file, and went through the process again.
There were no difficulties whatever. The OCR seems to be perfect
although I have yet to read through it. The txt files are about 3 KB each.
The only problem is tables; these do not preserve their original format,
and I need to inquire of their tech support how to do this.
It might have been simpler if I had catenated all the pnm files and
uploaded just one file for conversion. But I do not know what happens to a
set of pnm files when catenated, and it might be tricky to get them in the
right order if one used a regexp in the cat command line so as to avoid a
lot of tedious typing. Something like
cat file[0001..0055].pnm  allfiles.pnm might work.
In short, I do recommend it.
How should I connect the the Demography Lab from afar
This used to be complicated, but now it is simple: use FreeNX. To do so
you will need to install a free client application on your machine and do a little configuring. Once you have it set up, you will be able to connect easily and efficiently and do just about everything from afar that you can do from 2232 Piedmont.
FreeNX is explained in http://lab.demog.berkeley.edu/LabWiki.
How can I just just get a remote Demography Lab login shell
The Demography Lab is accessible only via encrypted connection.
Telnet, and rlogin are not encrypted so you cannot use those. If
your personal computer runs linux or mac OSX, ssh is probably
installed and usable, just open (``Terminal'' on a mac) and shell type
@: ssh demog.berkeley.edu
NOTE that this is also the command you would use to connect to a
server from within the local network - except instead of
demog.berkeley.edu you would type the name of the server
e.g. tapinos, or coale.
If you are running Windows, below are two other options.
How can I get my ethernet card equipped portable onto
the network
There are two network switches aka ``laptop landing zones'' in the
building. One is in the basement lab and the other is in the
Library. If your machine has an ethernet card (which could be built in
or PCMCIA) you should be able to connect simply by:
- leaving all network
parameters set to their default values. If you need to reset these
values - the key idea is to allow the DHCP server to assign all of
the ipaddresses, network masks & etc.
- Connecting your machine to an unused port on one of the above
mentioned switches via a ``category 5'' patch cable. (It looks like
a telephone wire on steroids). On a good day there will be such a
wire sticking out of a port on the switch.
AirBears. AirBears is run by IST, it is available from all over campus to anyone with a CalNet ID.
DropBox is an application that synchronizes files and directories between machines. You can configure it to do so between your portable machine and the Demography servers. Just find [Applications] [Internet][DropBox].
TWO IMPORTANT CONSIDERATIONS If you decide to setup DropBox:
- Do not put the DropBox folder in it's default location. During the configuration process make sure that DropBox puts it's folder in /data/commons/your-userid otherwise it will quickly use up your home directory quota.
- It is a good idea to configure DropBox to only share some of your stuff. There is no need to access you collection of Woody Allen movies on the Demography server. Just share the part of your DropBox volume that you do science with.
sftp
If you have secure shell installed on your home computer, you can use
sftp. The sftp program functions somewhat like ftp
- which we no longer use as it is not encrypted.
If your home machine runs Linux, you would type:
@: sftp userid@demog.berkeley.edu
after logging in, you can move around and find stuff using cd
and ls. To move a file to the machine you are sitting in front
of, type get filename to move a file to the Demography Lab
network, type put filename.
Under MSWindows, the ssh which you can download for free (as long as
you affiliated with UCB) see 6.2, has sftp application with a
reportedly ``easy to use'' interface.
NOTE: sftp is picky about what it sees on STDOUT. If your
.bashrc echo's a message, it is possible that sftp
will hang after taking your password.
One option for transferring/synchronizing entire directories is
rsync. Rsync is free and available on many platforms. It is
much more powerful than it is simple to use so be careful. Treat it as
you would a circular saw...with all the safety guards removed. Read
the man page carefully before experimenting. Your best friend, where
rsync is concerned, is the --dry-run argument. Also,
note that in order to use rsync from outside of the department,
you will need to tell rsync to operate over an encrypted
connections. This is done via the -e ssh argument.
Here's a simple example of how to move all the files from a directory
called dissertation in your Demography Lab home directory, to
directory called backup/dissertation on your home computer.
Assuming your home computer runs Linux, of course:
@: rsync -uva -e ssh userid@demog.berkeley.edu:dissertation ./backup
How can I print from my portable
Instructions for setting up your portable computer to print to Demography printers are found in http://lab.demog.berkeley.edu under the [Documentation] link.
[printing from windows machines]
How can I find my "mac address"
The ``mac address'' also goes by the names ``ethernet address'',
``hardware address'', ``station address'', ``ethernet id'' and
``physical address'' and perhaps there are others. It is a 12 digit
hexadecimal number generally shown with a ``:'' separating each pair
of digits. Since it's hexadecimal, digits include the letters A-F.
For example: ``00:0C:76:00:4A:FA''.
In most cases the mac address will be printed somewhere on you network
card. If not, your computer can tell you. Under Linux the command is
/sbin/ifconfig. The numbers you want will be labeled
``HWaddress''.
Under Windows, if you can find a ``command prompt'', you can type:
ipconfig /all. The answer will be reported as ``physical
address''. NOTE that there may be more than one such physical
address so make sure you get the one associated with the wireless
card. (Thanks to Sarah Staveteig for this)
Here is a helpful site with more instructions on how to find your mac
address under various OS's: this http://www-dcn.fnal.gov/DCG-Docs/mac.
Be especially vigilant if you have two or more network devices-as
most portable computers do. Each
such device has its own unique mac address. Make
sure the mac address you give us is associated with the device that
you plan to connect to the LAN with.
A good place to start is with the Not so short guide available
at http://www.demog.berkeley.edu/Refs/lshort.pdf. There are also
several pretty good books on using LaTeX. Unfortunately the tend to be
rather expensive. There should be a few copies of LaTeX: A
Document Preparation System by Leslie Lamport lying about the lab.
Emacs is great way edit LaTeX documents, if you like emacs.
By visiting a buffer/file with a .tex suffix,
emacs should put you in ``LaTeX'' mode all sorts of good things will
follow therefrom. Documentation on Auctex can be found at
http://www.demog.berkeley.edu/Refs/auc-tex.ps
For those not inclined toward emacs, there are other choices such as
LyX http://www.lyx.org/ or on macs, TeXshop http://pages.uoregon.edu/koch/texshop/
Can LaTeX documents be converted into pdf
yes
pdflatex can do this.
@: pdflatex filename(.tex)
.
But embedded graphics are lost, so if your document is just text this
is quick and easy. But...
If your document has embedded graphics then the two step process below
works very well:
@: latex filename.tex
@: dvips -Pcms filename.dvi
@: ps2pdf13 filename.ps
It is also very effective in almost all cases to convert the
.dvi file to pdf using:
@: dvipdf filename.dvi
.
What's the best way to put LaTeX documents on the web
There are at least two pretty good ways of doing this:
takes
filename.tex and
creates a single filename.html - with potentially lots of other files
on which that single html file relies, e.g. graphic images converted
to .png format.
The command
will create a subdirectory called
filename containing a bunch
of HTML files linked together. Just give that directory name as the
URL. Because all the filenames and links are machine generated, it is
not fruitful to attempt to edit the HTML files. The right approach is
to edit the latex files if you need to change something.
{\use{hyperref} is a nice package to include in documents that
are bound for the web.
There are two pretty good choices:
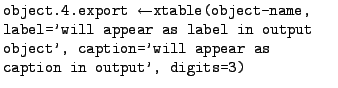
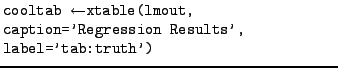
- If the data for your table happens to reside in R, then you can
use the xtable() function to output a chunk of LaTeX for
inclusion. See 3.3.1 for details
- If you prefer to create tables in a spreadsheet program, then
you can use gnumeric. See 7.0.5
How can I use gnumeric to make tables in LaTeX
A reasonable approach for making tables in LaTeX is with
gnumeric. Gnumeric is nice spreadsheet program which can read
.xls files and can save them as .tex files.
It is of course, not as simple as one might wish. Gnumeric uses the
longtable package so in order to modify what gnumeric
does, you will
to come to terms with longtable.
Here is a rough procedure for getting a table into a LaTeX
document. If your tables aren't too complicated and you are not too
picky, it'll probably work.
But if the wheels come off, you'll want to have a look at the
documentation - there's lots of LaTeX docs at www/Refs/LaTeX-DOCS.
- Create your table in gnumeric
- you could do this by importing
an .xls or .sxc file or you can start from scratch
or whatever-it's a spreadsheet program. Resist the temptation to
get fancy, colors and fonts and such will be lost in the next
step. Make sure each table is in a separate tab. It would be smart
not to include the title of your table in the
gnumeric version. That goes in
\caption later.
- save the file as LaTeX
- Save each table to a file. Use
[file][save as] and select ``LaTeX 2e.''
- Follow the directions in the file you just created
- The section at the top of the file that gnumeric spit out
informs you of all the the
\usepackage commands that you'll
need to insert in your ``including'' document. That is in the file
that you want the tables to show up in ultimately.
All of the \usepackage and \newlength commands come
between the \documentclass and the begin{document}
command. That is the go in the ``preamble.''
- Edit the file that gnumeric wrote
- The file that
gnumeric creates includes a ``float'' it is the moral
equivalent of something inside a:
  \begin{table}[htbp]

  \end{table}
You'll surely want to add a
\caption and a \label to your table. To do so, you need
to edit the file that gnumeric wrote.
Look for the command that looks like:
\begin{longtable}[c]{%
        b{\gnumericColA}%
        b{\gnumericColB}%
        b{\gnumericColC}%
        b{\gnumericColD}%
        }
and make it look like this:
\begin{longtable}[c]{%
        b{\gnumericColA}%
        b{\gnumericColB}%
        b{\gnumericColC}%
        b{\gnumericColD}%
        }\caption{Fascinating Table Showing Dramatic Result}\\
\label{tab:fascinating}
NOTE the \\ at the end of the \caption.
- use input to include your table
- . The
\input
directive will act as though the input'ed file is part of the
including document. NOTE that since the input'ed file contains a
table-like float, the table counter will be updated, and the
listoftables directive will recognize it as a table. Also,
since it's a float, the table will
appear where LaTeX thinks it should - which might not be right where
the \inpt directive resides.
Reading and Writing USB devices, CDROMs, Floppies, and DVDs
The most convenient way to access the stuff on your floppy or CDROM,
is to make the contents of the entire disk part of the
filesystem8.1 The process of
joining a device to the filesystem is known as mounting and can
be accomplished manually via the mount command. But generally,
the workstation will mount it automatically or nearly automatically
and put something on your desktop for you to click on.
So, you stick your CDROM or floppy or USB device into the
appropriate slot and then look for evidence of your new device.
On a good day, your workstation will automatically mount it and
there by join it to the filesystem at the approrpriate mount
point8.2. It will also probably pop up a nautilus
(file manager) window in which you can putz around and click and drag
and whatnot.
Well if you've been bad, and you device does not appear as promised
you can try the following things:
Though mounting a device is simple and automatic, it is not the only
way to access data on floppy disks. See Section 8.6 for an
alternative.
Do I have to ``mount'' floppies, zips and CDROM?
Yes (except for floppies
8.3) - if you
want to see what is on them, but the workstation will do it
automatically for you.
Do I also have to ``un-mount'' removable media?
YES YES YES.
especially if you just wrote something to it.
Unix often ``buffers'' writes in order to be more efficient. If you
just yank a the media out of the drive - or disconnect a USB device,
who knows what's been written and whether files have been closed.
The easiest way to un-mount a device is to click
on the
![\includegraphics[scale=.025]{diskmount}](img36.png) icon (on your taskbar) then select
[unmount] or [eject].
icon (on your taskbar) then select
[unmount] or [eject].
If your are working with the device through the filemanager
(nautilus), then should be an unmount or ``eject'' button within
nautilus as well.
Figure 8.1:
Auto mount points
 |
In the simplest case where you have a standard 1.44MB
floppy and you want to put a basic DOS filesystem on it (so you
can read the disk on a windows machine) just put the disk in the
drive and type:
@: formatfd
This command is locally aliased to run:
/bin/fdformat /dev/fd0H1440; mformat a:
read on to find out
what this means.
If you only put tar files on floppy
diskettes then the ``high level'' format described below is
irrelevant. It neither helps nor hurts to create it. You
must, however, be sure that your diskette has a low-level
format. Instructions for creating a low-level format are given
below. But if you wanna save time... just run
@: formatfd
like everyone else. Then
@: tar -cvf /dev/fd0 ./path/to/files
Floppy disks have 2 levels of formatting: a ``low level'' format which
determines how the little ones and zeroes are stored on the diskette.
This has to do with tracks and sectors and stuff like that. Once the
low level format is done, diskette controllers handle it and it
becomes very uninteresting to end users. The only thing you need to
know is that if you have a raw diskette, you have to make sure this
low level format is created. In almost all cases it will be pretty
clear if the low level format is faulty, because just about nothing
will work.
The second ``high level''
format refers to the filesystem. The filesystem takes care of file
names, permissions, directory structures and that sort of thing.
For most purposes, you will want your floppy disk to have a DOS or
``FAT'' filesystem on it. These can be read both by Windows and Linux
machines. If you only use Linux machines, you may wish to format your
diskettes as ext2 but you will probably be the only person
on the planet who does this.
If you wish to put an ext2 (linux) filesystem on your floppy disk, use
the command:
@: /sbin/mke2fs /dev/fd0
Use the
fdformat command to install
a low level format on a raw diskette. You need to tell the fdformat
command what kind of diskette you have. The way this is done is to
specify the appropriate device driver. In the box above, the device
driver is
/dev/fd0H1440 which more or less translates to
floppy disk 0 High density 1440 KB. All machines around here
have 1 or fewer diskette drives so the ``/dev/fd0'' part never
changes. Where you need to give some thought is to the ``H1440''
part. 1440 KB is very much the standard but it is possible to find
some ``H720'' diskettes. If you have anything else, I would toss
it. Diskettes are cheap.
To put a standard DOS (FAT) filesystem on your diskette use the
command:
@: mformat a:
Note that mformat is part of a suite of tools known
collectively as mtools. See Section 8.6.
How can I access diskettes with DOS-like commands?
The
mtools suite of programs allows you to operate on
diskettes, just like you used to - if you are over 30
8.4.
mtools contain a version of just about all of
the DOS commands that can be used to fiddle with floppies just stick
an 'm' in front of the DOS command as in mcopy,
mdir, mcd, mdel and mdeltree. All of these exist and work as you
might not expect with a: instead of /dev/fd0.
Consult the man page (@: man mtools) for a complete list.
What steps are involved in writing a CDROM?
A growing subset of machines (including nearly all the machines in the
basement lab) have (re)writable CDROM nd DVD
drives. Obviously, writing to a CD will not work well unless you are
using one of these machines.
Writing CDs is a 2 step process (or a 3 step process if you include
going to the store (or Rm 101B) to buy a blank CD-(W)R disk). First a
disk image must be created. This is file that contains the image of
what will eventually be on the CD. Since you can only write once to
CDs you cannot simply add files one at a time. The entire filesystem
including the bookkeeping parts that you don't generally realize are
there must be assembled before the CD can be written. A filesystem image
assembled in this way is usually stored in a file with a ``.iso''
suffix. The second step is to transfer this filesystem image to the
CD.
You need only be vaguely aware of these two steps if you choose to
make your CDs with nautilus file manager application - aka
``the easy way''.
How might one write a CD/DVD the easy way
- Assemble all the files that you want to write to CD or DVD into one or
a few directories - which include only stuff that you want
to copy to the CD/DVD
- Open a nautilus window either by clicking on
![\includegraphics[scale=.025]{homedir}](img42.png) or by selecting:
[Applications][System Tools][file Browser]
or by selecting:
[Applications][System Tools][file Browser]
- From the nautilus [Places] menu select
[CD /DVD creator]. This will produce another nautilus
window.
- Navigate, in the original nautilus window to the
directory containing the stuff you want to copy to CD and drag it
over to the CD/DVD Creator window.
- When everything that you want to copy to CD is in the
CD/DVD Creator window, hit the hit the
 button.
- You should now be prompted to insert a blank or re-writable
disk. It should be enough to stick a disk in the drive and close it,
but often it takes the machine upwards of 30 seconds to figure out
that yout you have complied with its request. Consequently, the
``Insert rewriteable or blank disk'' dialogue box sometimes appears
and reappears and reappears - you might need to hit
 seventeen or eighteen times.
The hard way isn't really all that hard and is useful if you want to
make sure that certain nonstandard features are included in your CD/DVD -
or if you just prefer typing to clicking. Follow the directions below
for first creating the disk image file and then for transferring it to CD.
To create the disk image,
use the
mkisofs
command. It works best if all of the files of interest reside beneath
a single top level directory, but this is not essential
8.5.
Suppose for example the you wanted to make a CD of
/data/commons/user/Dissertation and all it's subdirectories.
The command would be:
@: 
cd-image.iso is the filesystem image that you want to make. The
.iso suffix is optional, but cheap so why not do it.
The
/other/72hours directory is a large
enough to hold many CD/DVD image files, but as the name suggests, data
in that directory will be erased without notice in 72 hours. In other
words, it's scratch space. You may substitute something meaningful for
 cd-image
.
Once your disk image is made, you can use wodim to transfer
it to CD - Or you can just
 on the .iso file in a nautilus
window and select Write to Disk.
on the .iso file in a nautilus
window and select Write to Disk.
The macho way is to use the wodim command. To transfer a cd
image called cd-image.iso that is in the current working
directory - probably /other/72hours. Don't forget to put your
blank CD/DVD disk in the drive before running wodim.
@: wodim -v -data cd-image.iso
Once the transfer operation is complete, you can inspect the CD's
content by mounting it. Just eject the CD and then push it back in.
NOTE: if you are re-using re-writeable media, you must
``blank'' or erase the disk before attempting to write to
it. See 8.7.2 for instructions.
How can use wodim to erase a cd/dvd?
A rewriteable cd/dvd must be ``blanked'' before new stuff can be
written to it. CDs are not like floppies or USB drives, you cannot
simply add files to an already written CD. The entire disk must be
erased in order for new content to be written.
To blank a disk:
- put the disk in the appropriate drive but do not close
the drive door
- execute the following command:
@: wodim blank=fast
On a good day, the drive should now close by itself and the blanking
process should start.8.6
On a not so good day, wodim will gag on the above
command. To make wodim try harder you can add the
-force flag. Ultimately, the following command will do the
trick, but it can take quite a while to complete:
@: wodim -force blank=all
Office Applications
Your best (long run) option for word processing is LaTeX -
See www.demog.berkeley.edu/Ownersmanual for and impassioned
diatribe regarding the virtues of logically oriented text processing.
If you lack sufficient idealism to pursue LaTeX - or if you just
prefer something will lower startup costs - the OpenOffice suite is a
good options.
OpenOffice (OO) is an open-source alternative to the Microsoft Office
software. OO is supported by Sun which directly supports StarOffice -
we generally use StarOffice here (since the campus buys it) but I'll
refer to it as OO anywya. OO works just about the same way as MS with
a few exceptions that might annoy you at first - if you are
accustomed to the MS way and are too rigid to consider alternatives.
OO and MS office software are sufficiently similar that one can
easily go back and forth between them. OO can both read and write all
of MS's secret proprietary formats and even has its own version of the
infernal talking paper clip.
It is also possible to run MS Office applications under Linux. We do
this with cxoffice See 10. Since MS applications run on
Linux only under duress, you can expect some quirks and glitches. Of
course, you expect that with any MS software.
It is less frustrating to work with the OpenOffice applications under
Linux. OpenOffice is also available for Windows and Mac for free.
If one moves back and forth between OO and MS, one must be a bit
careful about equations. OO can display equations created in MS but
it is best not to try to edit them. MS does not understand
OO's equations at all.
OpenOffice also has a spreadsheet that compares well to MS Excel. As
with the word processors there are slight differences, but OO can do
everything that MS can and once you get used to the small differences
it is not difficult to move back and forth between them.
The first time you run open office, a screen will popup
offering to allow you to ``install'' OpenOffice. All the default
suggestions are fine so if you're brave you can stop reading here and
click away. More details for the more timid are below.
What happens first will depend on whether you have used previous
versions of OpenOffice before. If you have you may be prompted to
update and old installation - resist this temptation and ``install''
in a new directory.
Eventually the following steps happen:
- You will be asked early on to read through a bunch of ``important''
information and then click
 to go on. (you can decide for
yourself).
to go on. (you can decide for
yourself).
- You will be asked to read and accept the license agreement
- You will be asked to enter ``User Data'' such as your name and
email address.
- You will give you a choice of installing either the ``workstation'' or the
``local'' version. ``Workstation'' is what you want to
choose. It is the default and it just installs about 1.2MB of ``dot
file'' that configuration files for you personal preferences and what
not. Choose the default and move on. You may be asked to replace files in
.kde2 - go ahead and accept.
- You should then be asked permission to create a new directory with a
long name that includes ``OpenOffice.org1.1.2'' (the numbers might be
higher by now). Say yes and everything should finish up nicely.
- Then you hit the
 . Some lights flash and then
you hit the
. Some lights flash and then
you hit the
 and you're done... with the installation
After the setup program exits, you can launch any of the various
OpenOffice applications as described in 9.0.6
How do I launch OpenOffice Applications
There are several ways of launching OpenOffice applications.
- from the command line
- If you wish to open an existing document
- either one produced in OpenOffice or in some Microsoft
application, you can type:
@: soffice filename
where filename includes the typical file suffix such as .doc or
.xls. soffice will choose the appropriate application to
open you document with.
If you wish to start a new document, then you can save keystrokes by
launching the particular application that you want to use. The
application command names are shown in Table 9.1
Table 9.1:
OpenOffice Applications
|
| Word Processor |
swriter |
| Spreadsheet |
scalc |
| Presentation |
simpress |
| Drawing |
sdraw |
| Equation editor |
smath |
|
- From the menu or panel
- the OO applications are in the menus under.
[Applications][Office]. They each have their own nifty
post-literate symbol on the panel.
- From the nautilus filemanager
- The filemanager, lives on the
desktop it's called ``userid's Home''. It shows you all the files
and directories and if you click on an appropriate document it will
open it with something. If the file in question is a native OO
document, then click and be happy. If, however, it is an MS
.doc file then there are lots of choices as to how it should
be opened and you will need to use the
to select which
application you want.
Running Windows Applications under Cxoffice
Crossover Office (or cxoffice) is commercial grade WINE
implementation. Its purpose is to allow windows addicts to run their
favorite applications under Linux.
It works amazingly well - considering the challenge. In other words,
it works, but there are a few bugs.
From the [RedHat][X Windows Applications] you can launch
Word, Excel, or Powerpoint. In nearly all respects these program
behave, under Crossover Office, exactly as the do under Windows. With
just a few additional idiosyncrasies and bugs thrown in.
Currently the following windows applications can be run from your
Linux desktop:
- MS Word 97
- MS Excel 97
- MS PowerPoint 97
- Census CD 2000
- Census CD 1990
- Census CD 1980
More will be added as we gain experience with this system.
If MS Word et. al. simply will not print - and will not give you any
sort of error message, the following procedure is likely to help. But
it is kind of radical. You should
not need to make a habit of this.
- Close all MS Applications or at least make sure that your work
is saved.
- delete your entire .cxoffice directory This is the directory
that stores your personal configuration. If you have changed
preferences and such, that will be lost. If you hate that prospect,
skip this step, and maybe redo the whole procedure if printing still
fails.
Be extremely careful with this command - if you screwup bad things
could happen.
@: cd; /bin/rm -r .cxoffice
- Reset CXoffice Either find it on the menu or else at the Unix
prompt type:
@: /other/cxoffice/bin/cxreset
When it asks permission to proceed, say yes.
- Verify that PRINTER and LPDEST are not set PRINTER and
LPDEST are environment variables that determine your default
printer. Their presence will screwup CXoffice. To find out if you
have these variables set type:
@: echo $PRINTER
@: echo $LPDEST
If the name of a printer is returned from either of these commands,
edit your .tcshrc file and delete them. See the Owner's
Manual if the phrase ``edit your .tcshrc file'' intimidates you.
If your .tcshrc file did set PRINTER or LPDEST, then you will
need to logoff and log back in before you continue.
- Verify that Wine-Postscript-driver is your default printer
Start word and try printing. Your default printer should be
``Wine-Postscript-driver''. The first time you print, you
might see an error message regarding memory. It can be
ignored.
If the above procedure worked, then printing to the
``wine-postscript-driver'' will launch a printing application which
will give you lots of choices as to where to send your print job and
how to print it. The first time you see this kprinter application you
must change the ``printer driver'' setting from LPD to
CUPS. This only needs to be done once (unless you do that
radical reset procedure in 10.3.1.
Hereafter, always select the
``Wine-Postscript-driver''. And never try to print MS docs to
status. (See 10.3.2).
The printer status fails to print MS Word files
status is the printer in the library. If you try to print an MS
Word file to it, you will get a line or two of
incomprehensible junk instead of your file. NOTE that for best results
you should print to the ``wine-postscript-driver'' rather than any
familiar printer directly. The ``wine-postscript-driver'' launches a
GUI application that gives you more control over your print
jobs. Printing to
status will not work from there either
however.
include:
- printing to a different printer
- printing to a file then running the command:
@: ps2ps filename - | lpr -Pstatus
The equation editor under cxoffice is prone to crashing but the
crashes are not random.
: when using the mouse click crisply. Do
not allow your heavy finger to rest with the mouse button
depressed as you select and drag mathematical symbols into your
equation. If you do equation editor will die. If not, it will function
acceptably
CensusCD 2000 works properly, but the 1980 and 1990 applications
generate lots of errors when you try to create a flat ascii or dbf
file of the data. Mapping works fine - it is only the data exporting
function that fails. In most cases, it writes the file before failing
for what that's worth. But you will need to use
[RedHat][CrossOverOffice][Reset Crossover Office]
to recover control of your desktop after each failure.
There is no good work around, you can just
write and clean up as noted above, or you can go to the library in
Haas or the lab in 64 Barrows to use these applications on native
windows machines.
Senate Bill 1386, Assembly Bill 700 and common sense dictate that care
must be taken with personal financial data stored on computers - especially
computers connected to the Internet.
By directive of the Chair, there shall be no systematic collection or
storage of protected Information on Demography Department
Computers. By Protected Information we mean ``protected
information'' as it is defined in the above noted Senate and Assembly
Bills. This includes an individual's first and last name in
combination with any of the following:
- social security number
- driver's license number
- financial account number
- credit card number
- a password enabling access to financial accounts
Staff, faculty and students are therefore instructed to remove any and
all such information from any database system or file
on any networked device in the Demography Department.
By Dec 31, 2005 (or when your account is set up) you will be asked to
sign a statement promising to comply with this directive.
The chair also advises that when called upon by outside agencies to
provide social security numbers for Demographers, polite resistance is
a good strategy. It is often the case that even though the important
looking form asks for a social security number, none is
actually required.
Sensitive data such as grades and exams which need to be accessed
on computers should either be stored on removable media only
or be encrypted using a public-key encryption system such as GnuPG
with an adequate keysize.
If you choose to encrypt files there are choices to be made about how
that should be done.
The program gpg (GnuPG) is the best option for encrypting
files. For details on how to use it's many features check the man page:
@: man gpg
Briefly, gpg has two modes of encryption:
If you need encrypt with multiple keys, contact carlm and we'll figure
something out. If you just want to do the easy thing see 11.3
How do I just do that easy thing you mentioned
To ``symmetrically cipher'' a file simply type:
@: gpg -c filename
you will be prompted twice for a pass-phrase - it can contain spaces
and it can be long.
You will probably see a message warning you about ``insecure
memory''. Don't worry about it unless you like to worry.
When complete you will have a file called filename.gpg as well
as your original unencrypted file.
Obviously it would be rather boneheaded to leave the unencrypted file
in place once you are sure that the encryption worked. right?
To decrypt the file you just encrypted type:
@: gpg -d filename.gpg > filename.decrypted
You don't need to call the resulting file filename.decrypted
any filename will do. But existing files by the same name will be
overwritten.
Before deleting the unencrypted file you may wish to check that this
process really worked. Here' how:
@: cmp filename filename.decrypted
cmp returns nothing if the two files are identical. If they are
not - it tells you so.
Now, you can safely erase the unencrypted file - if you can remember
the password.
L
How much disk space can I use on demography system
The short answer is ``lots'' - but there is a more complicated
answer. The demography system maintains 3 distinct types of disk space
for distinct types of uses:
- home directories
- Space in home directories is the most limited
and is to be used for the highest value files. These include
programs that you write, correspondence that is not too old,
preference files for software that you use and the
text for your dissertation. These are files that were expensive to
produce and would be extraordinarily painful to reproduce. The
reason this space is limited is that we back it up very carefully
and very frequently. If we backed up all of our disks as carefully as
we backup home directories we would do nothing but load and unload
tapes - and of course we would make even more mistakes than we
already do.
- data directories
- Space in data directories such as
/data/commons is less limited. This is a good place to store
things like data sets. Data directories are for large files which can
be relatively easily reproduced - by say downloading them again.
Data directories are backed up weekly. Since data sets are not
supposed to change - it doesn't matter that backup copy is a week
old.
- temporary directories
- Temporary directories are for temporary
files (duhhh). Programming in SAS or STATA means writing lots of
temporary files. By default SAS writes temp files to /72hours (aka
/Sastemp). STATA on the other hand writes those files to its current
directory (so watch out for STATA).
These intermediate results / temporary files belong in /72hours where
they are not backed up an are deleted after 72 hours of disuse.
If you are using large data files, and you politely store
them in a compressed state (See 12.4 for advice on this)
temporary directories like /72hours are generally good places
to uncompress.
NOTE: /72hours are not networked. That is,
/72hours on coale is not the same as /72hours
on tapinos or census or whatever. They are all
different, and to move stuff between them you need to use a program
like sftp.
Table 12.1:
Quotas and backup times
|
| Directory |
Soft limit |
Hard limit |
Grace period |
Backed up |
|
| home directory ~ or
/hdir/0/username |
350MB |
500MB |
7 days |
daily |
|
| data directories /data/commons |
1.5GB |
7GB |
28 days |
weekly |
|
| temporary directories: /Sastemp /other/72hours |
politeness |
whole disk |
deleted after
72 hours |
never |
|
|
The quota system is designed to keep users from ``carelessly'' consuming
huge amounts of disk space. Of course this is far more complicated
than simply refusing to do anything for users when their allotment of
space is used up. That would be mean. Instead when a user exceeds her
soft limit for a particular filesystem, the quota system begins a
count down that lasts a period of days. While that countdown is in
progress, the user can operate as if nothing were wrong - but she
will get warnings when she either logs onto a server or reads
her email.
When the countdown (or ``grace period'') is complete, the system then
imposes the only penalty that gets the users attention: no more disk
writes until disk use falls below the soft limit. Read access is still
permitted, and so is file removal.
There is also, a hard limit over which a user's disk use can
never go. This is designed to stop terrorist processes from filling up
entire disks.
We set the hard limits, soft limits and grace periods independently
for each filesystem. Home directories,
/data/commons, /Sastemp and /other/72hours
all live on different filesystems and therefore have different
soft limits hard limits and grace periods.
If you are the sort of person who prefers to shape her own destiny,
then it behooves you to periodically monitor the growth of that
garbage heap which is your home directory. Since your stored email as
well as your email inbox count against your Home directory
quota, things can get quickly out of hand.
The command for determining your quota status is
quota, the
command
@: quota -v
shows your disk use on all relevant filesystems. If you are over your
soft limit, it tells you how much time remains before you will be
punished.
A good place to start your search for trash is:
@: findtrash
which is an alias that executes:
du -sh .[a-zA-Z]* * |egrep -e '[0-9]M' | sort -n.
which (obviously) produces a listing of directories ( including
``.dot'' directories) sorted by space consumed. Note this alias takes
a minute to run
For more precise tasks, the command du (for ``disk use'') will produce a directory by
directory listing of amount of space used in each of directory. With a
-k flag it will give you the data in Kilobytes, on linux
machines
the -h flag gives you file and directory sizes in ``human''
readable units.
@: du -k |less
Will give you the output page by page.
Once you locate a directory with lots of stuff in it, you can use
ls and sort to find the big files. The command
@: ls -s | sort -n
prints each file precede by a number indicating it's size, the
sort -n order the output numerically.
If you send lots of attachments back and
forth in email - and particularly if those attachments have MS Word
documents in them, then you can fill your disk quota quite
rapidly. Because pine, by default, saves your outgoing messages with
attachments, each time you save a message and respond, you might be
storing two copies of the attachment. Word files tend to have a very
low value to weight ratio.
Browsers are another source of
crap. Because they ``cache'' pages in order for you to be able to
backup quickly, they too can fill your disk. Within each browser, you
should be able to click on something labeled ``clear disk cache''.
Crossover office - which runs all of the
Microsoft applications tends to store a whole lot of stuff in your
.cxoffice directory. Since the directory starts with a ``.dot''
it is not obvious. You can delete this directory with impunity. If you
switch to
OpenOffice (See
9), it won't come back. If you run
cxoffice, the directory will be recreated.
filemanagers (those pointy clicky applications that
spare you the indignity of remembering
cd and
ls, don't actually ``delete'' files but rather
move them to your
.Trash folder.
.Trash folders can
exist in locations other than your home directory e.g. in
/data/commons. You can erase these directories with impunity.
How can I compress files
Compressing files can save you a lot of space. Data files in
particular can sometimes compress by as much as 90%. There are
several different programs/algorithms for compressing files. Three
common ones are:
- standard UNIX compress
- gnu zip (aka gzip)
- bzip2
bzip2 is the fastest and most powerful, but it is not yet standard so
if you need to uncompress your data later on an Amiga, bzip2 might be
a bad choice. GNU zip, gzip offers a good compromise between
universality and power. compress is not much used anymore.
To gnu compress a file type the following:
@: gzip filename
The result will be a file called filename.gz. The original file
will not be harmed - you must remember to remove filename
yourself, otherwise file compression will just have resulted in
additional disk usage.
There are two ways to uncompress a file - one deletes the compressed
file and one does not.
To uncompress leaving the compressed file in tact, use zcat:
@: zcat filename.gz > newfile
This will create a file called newfile leaving filename.gz in
tact. This is a useful thing to do if your datafile is so large that
it takes a long time to compress and you are uncompressing onto
a temporary directory (See 12.1 for details).
To uncompress and remove the compressed file at the same time type:
@: gunzip filename.gz
How can I compress a whole directory
A good way to compress an entire directory and all it's subdirectories
is with the tar command. This creates a single ``tape archive''
file which can later be ``un-tarred'' to reproduce the original
directory structure. The tar command has lots and lots of
options - so check out the man page ok?
Here is a simple example:
@: tar -czvf dissertation.tgz ./dissertation
Here ./dissertation is a directory holding lots of files and
perhaps many subdirectories as well. The original directory is not
changed by this action. So if you goal is to save space, you will need
to erase the uncompressed original. dissertation.tgz is a
compressed tar file which can be moved,
mailed, renamed, or erased just like any other file. But unlike any
other file, it can also be untarred to reproduce the original
directory - perhaps in a different place, on a different
computer. Here is the command to untar:
@: tar -zxvf dissertation.tgz
The file dissertation.tgz is not destroyed or changed in this
process. However, untarring can overwrite preexisting files.
The command above will recreate ./dissertation exactly as it was when
you tarred it. If, therefore, you tar -x ... in the same
directory as you tar -c'ed earlier and in between time, you
improved but did not rename, some files in dissertation then
the untarring will overwrite the new improved files with the old files
of the same name. This is all fine of course, As long as you expect
it.
The purpose of tape backups is to allow us to recover from nuclear
attack, earthquake, typhoon or firestorm. It is vital that users
realize that system backups are worthless for reproducing scientific
results from a project more than a few days old. Backups are designed
to allow us to recreate the filesystem as it (mostly) was on a very
recent day. If a disk fails, we need to be able to replace the disk
and its contents as of yesterday and that is the goal of system
backups.
In order to concentrate resources on backing up the most
critical files, we employ several strategies of which a good
scientist should be aware:
- We do not backup really large files. Files larger
than 500MB are not backed up - ever. They can't be anything but
data or intermediate results. Either way, a serious scientist will
be able to reproduce either easily.
- We do not backup .dta files Stata .dta files are
assumed to be intermediate work so we don't back them up. If you
wish to follow the unhealthy practice of storing your raw data as
.dta files, then you should compress them (and of course make a CD
of it). We do backup .dta.gz files - as long as they are
smaller than 500MB.
Besides saving resources, the system we have in place encourages good
programming practice, reproducibility of results and thus good science.
Knowing as you do now that large data files are vulnerable to hardware
failure and terrorist attack, you have no doubt resolved to follow the
practices outlined in Demog 213:
- Store your programs in your home directory; store your data in
/data/commons
- Make sure your programs can always take you from raw data to
your current results. Obviously practices such as
creating new variables in a GUI and then creating other newer variables
based on those variables - all without ever writing the code down in
a way that allows it to be rerun - are right out.
- Make an off line copy of your raw data (unless you just got if
from IPUMS or equivalent) (See 8.7 for instructions on
writing CDs).
- Make an archive of your entire project as soon as it is
complete. Burn it to a CD; send a copy to your mom.
Reproducing results that you generated 2 years ago is a task for which
system backups will be completely useless. In order to be able to
reproduce your work you must make an archive of your project at the
time it is complete. That archive may contain files from all over the
filesystem and, if you're clever, it will contain some notes on how
you did what you did so you (or your RA or your biographer) can do it
again after you are dead.
Archives are the responsibility of the only person who cares about and
understands the work you do.
There are several choices regarding archiving. For projects requiring
less that 750MB, CDROMs are a good choice. DVD's hold about 5GB and
are just as easy to write as CDs. See 8 for instructions
on how to use the various removable media.
CEDA/Demography Lab
Frequently Asked Questions
This document was generated using the
LaTeX2HTML translator Version 2008 (1.71)
Copyright © 1993, 1994, 1995, 1996,
Nikos Drakos,
Computer Based Learning Unit, University of Leeds.
Copyright © 1997, 1998, 1999,
Ross Moore,
Mathematics Department, Macquarie University, Sydney.
The command line arguments were:
latex2html -split 0 -local_icons faq
The translation was initiated by Carl Mason on 2012-08-21
Footnotes
- ...
filesystem8.1
- the filesystem can be thought of as the collection
of all of the directories to which you can cd. Although this tree of
directories behaves as though it lives entirely on the local hard
disk, it is in fact distributed across many machines which share
their local disks via a protocol known as NFS.
- ... point8.2
- The mount point associated with the newly
mounted device is the place in the filesystem where the CD or floppy
has been grafted onto the filesystem 'tree'. In other words, if the
floppy drive is mounted on /media/floppy then, in a terminal
window, you can cd /media/floppy and see and touch all of the files on
that disk. Table reffig:mount1 shows the auto-mount points for
each device
- ... floppies8.3
- See Section 8.6
- ... 308.4
- If
you're under 30 DOS stands for Disk Operating System - it was widely
in use in the 1980s
- ... essential8.5
- there
is a man page on mkisofs which describes all the options
- ... start.8.6
- If you blank a lot of disks it might be
easier to set your hardware options so that the machine does not
automatically try to mount a disk as soon as the drive door closes.
To do this go to
[System][Preference][Hardware][Removable
drives and media] and clear the ``mount removable media when
inserted'' check box.
Carl Mason
2012-08-21
 ;
;
![\fbox{\parbox[c]{.8\textwidth}{Be patient, \texttt{foreign} library functions ca...
...utes to be converted and read in. Unless you get an error
message, get coffee}}](img13.png)
![\fbox{\parbox[c]{.8\textwidth}{NOTE: in the example, the two y-vectors are plott...
...cal, you can show the second x-axis by
typing: \texttt{axis(side=1,line=1)}
}}](img16.png)


![\fbox{\parbox[c]{.8\textwidth}{When you're finished, why not turn off the scanner and thereby
save the world.}}](img23.png)
![% latex2html id marker 1809
\fbox{\parbox[c]{.8\textwidth}{
NOTE: you do not ne...
...er. You can operate the scanner by remotely logging in (See
Section \ref{ssh})}}](img26.png)


![\fbox{\parbox[c]{.8\textwidth}{NOTE: firewall software often inteferes with ssh ...
...bolical
ways. If things don't work as advertized, try disabling your firewall}}](img33.png)
![% latex2html id marker 2102
\fbox{\parbox[c]{.8\textwidth}{BUT WAIT: Campus sec...
...e no clue about
what a mac address is or how to find it see \ref{macaddr}.
}}](img34.png)
![% latex2html id marker 2933
\fbox{\parbox[c]{.8\textwidth}{
What you cannot rel...
...s
\textbf{un-mounting}. See Section \ref{umount} for the why and how of this.
}}](img35.png)
![\fbox{\parbox[c]{.8\textwidth}{NOTE that unmounting will fail if you are accessi...
...cations that might be accessing the media
\textbf{before} you can unmount it.}}](img37.png)
![\fbox{\parbox[c]{.8\textwidth}{\textbf{\textit{Gotcha:}}If you are using previou...
... to mount it for you. You cannot write to a disk
that is mounted for reading.}}](img41.png)
![\fbox{\parbox[c]{.8\textwidth}{The $<$\texttt{iso-level 3}$>$ arguement tells \...
...options violate
the ISO9660 standard but \lq\lq happen to work on many systems''. }}](img44.png)
![\fbox{\parbox[c]{.8\textwidth}{If the above command fails, it is probably becaus...
...ttt{wodim dev=/dev/scd0}}
\smallskip
\par
will then solve the problem.
\par
}}](img46.png)
![\fbox{\parbox[c]{.8\textwidth}{NOTE: files with names like \texttt{core} or
\tex...
...you can safely delete them - and you should
as they tend to be \textbf{huge}.}}](img50.png)